In the ever-evolving landscape of JavaScript and Nodejs, developers are constantly discovering new ways to write cleaner and more efficient code. One such innovation is the ability to use top-level await() without the need for an enclosing async() function. This feature, introduced in modern versions of Nodejs (14.8.0 and later), provides an elegant approach to handling asynchronous operations in your codebase. In this blog post, we’ll delve into the mechanics of top-level await() and explore its benefits and use cases.
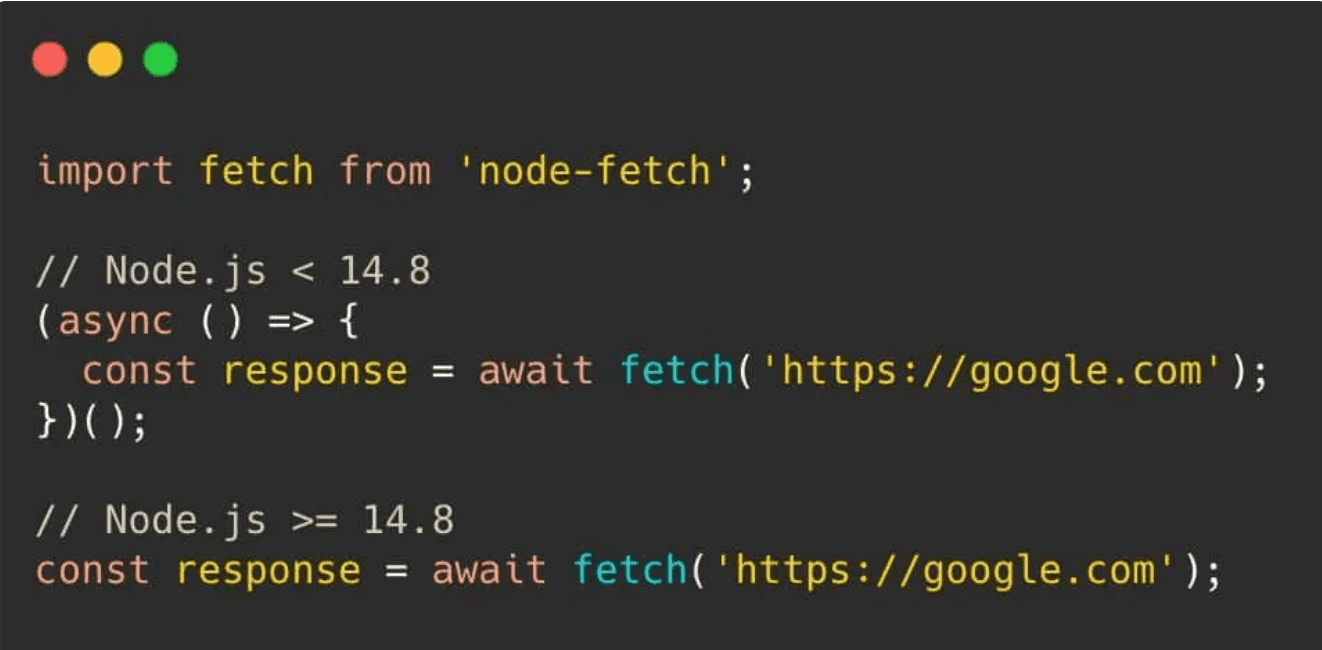
Fig 1: Top level await()
Understanding Top-Level await():
Traditionally, when dealing with asynchronous code in JavaScript, developers have relied on the async() and await() keywords. The async function always returns a promise, and await is used to pause the execution of the function until the awaited promise is resolved. However, the introduction of top-level await() brings a new dimension to this paradigm.
With top-level await(), you can directly use the await keyword at the top level of a module without wrapping it in an async function. This is particularly useful for concise and readable code, as it eliminates the need for an additional function layer. Refer
Enabling Top-Level await():
To start using top-level await() in your Node.js project, follow these steps:
Update your package.json:
In your package.json file, add the "type": "module" configuration. This informs Node.js that your project is using ECMAScript module syntax.
{
  "name": "my-nodejs-project",
  "version": "1.0.0",
  "type": "module",
  "scripts": {
    "start": "node index.js"
  },
  "dependencies": {
    // Your dependencies here
  }
}
Utilize .js or .mjs Extensions:
Node.js treats files with .js extension as ES modules when the "type": "module" configuration is set. Alternatively, you can use .mjs extension to explicitly indicate that a file is an ES module.
Using Top-Level await():
Once your project is configured, you can start using top-level await() in your modules. Consider the following example:
import fetch from 'node-fetch';

const response = await fetch('https://dummyjson.com/products/1');
const data = await response.json();
console.log(data);

// Output:
// {
//  id: 1,
//  quote: 'Life isn’t about getting and having, it’s about giving and being.',
//  author: 'Kevin Kruse'
}
Benefits and Use Cases:
Top-level await() offers several advantages for simplifying your codebase and improving code readability:
-
Reduced Boilerplate: The absence of an enclosing
async()function reduces unnecessary boilerplate code, leading to cleaner and more concise code. -
Dynamic Dependency Pathing:
const strings = await import(`/i18n/${navigator.language}`);
This allows for modules to use runtime values in order to determine dependencies. This is useful for things like development/production splits, internationalization, environment splits, etc.
- Resource Initialization:
const connection = await dbConnector();
This allows modules to represent resources and also to produce errors in cases where the module cannot be used.
- Dependency Fallbacks: The following example attempts to load a JavaScript library from CDN A, falling back to CDN B if that fails:
let jQuery;
try {
  jQuery = await import('https://cdn-a.example.com/jQuery');
} catch {
  jQuery = await import('https://cdn-b.example.com/jQuery');
}
Control Flow Effects of await()
When encountering an await within code, whether in an async function or a module, the expression being awaited is executed. Meanwhile, any code reliant on the result of this expression is temporarily halted and placed into the microtask queue. This action liberates the main thread for the next task within the event loop. This holds true even when the awaited value is a promise that has already been resolved or when it’s not a promise at all. For instance, consider the subsequent code snippet:
async function foo(name) {
  console.log(name, "start");
  console.log(name, "middle");
  console.log(name, "end");
}

foo("First");
foo("Second");

// First start
// First middle
// First end
// Second start
// Second middle
// Second end
In this scenario, the two async functions produce a synchronous outcome since they lack any await expressions. Consequently, the three statements transpire within the same execution cycle. In terms of promises, this function can be likened to:
function foo(name) {
  return new Promise((resolve) => {
    console.log(name, "start");
    console.log(name, "middle");
    console.log(name, "end");
    resolve();
  });
}
However, with the introduction of just a single await, the function transitions into an asynchronous state, leading to the postponement of subsequent statement execution until the subsequent execution cycle.
async function foo(name) {
  console.log(name, "start");
  await console.log(name, "middle");
  console.log(name, "end");
}

foo("First");
foo("Second");

// First start
// First middle
// Second start
// Second middle
// First end
// Second end
Conclusion:
Top-level await() without the need for an enclosing async() function is a powerful addition to the Nodejs ecosystem, offering developers a simpler and more intuitive way to handle asynchronous operations. By leveraging ECMAScript module syntax and configuring your project accordingly, you can unlock the benefits of this feature and write cleaner, more readable, and efficient code. Whether you’re building a small script or a larger application, top-level await() is a valuable tool in your JavaScript toolkit.
✨ Thank you for reading and I hope you find it helpful. I sincerely request for your feedback in the comment’s section.