API documentation is crucial for any backend service, and Swagger/OpenAPI has become the de facto standard for documenting REST APIs. However, maintaining documentation manually can be time-consuming and error-prone. This guide explores how to automatically generate Swagger documentation from Joi validation schemas using the joi-to-swagger library, ensuring your API documentation stays in sync with your validation logic.
When implementing API documentation, it’s important to consider health checks and graceful shutdown for your Express application, especially in production environments.
Understanding the Components
Before diving into implementation, let’s understand the key components:
-
Joi Validation:
- Schema-based validation library
- Defines data structure and validation rules
- Used for request/response validation
-
Swagger/OpenAPI:
- Standard specification for REST API documentation
- Provides interactive documentation
- Supports testing endpoints directly
-
joi-to-swagger:
- Converts Joi schemas to Swagger/OpenAPI format
- Maintains consistency between validation and documentation
- Reduces documentation maintenance overhead
Setting Up the Environment
First, let’s set up our project with the necessary dependencies:
// package.json
{
  "dependencies": {
    "express": "^4.18.2",
    "joi": "^17.11.0",
    "joi-to-swagger": "^3.6.0",
    "swagger-ui-express": "^5.0.0"
  }
}
Install the dependencies:
npm install express joi --save
npm install joi-to-swagger swagger-ui-express --save-dev // Save as dev dependency
Creating Validation Schemas
Let’s create a sample API with validation schemas:
const Joi = require('joi');

// User creation schema
const createUserSchema = Joi.object({
  username: Joi.string().min(3).max(30).required()
    .description('Username must be between 3 and 30 characters'),
  email: Joi.string().email().required()
    .description('Valid email address'),
  age: Joi.number().integer().min(18).max(120)
    .description('Age must be between 18 and 120')
});

// User response schema
const userResponseSchema = Joi.object({
  id: Joi.string().uuid().required(),
  username: Joi.string().required(),
  email: Joi.string().email().required(),
  age: Joi.number().integer(),
  createdAt: Joi.date().iso()
});
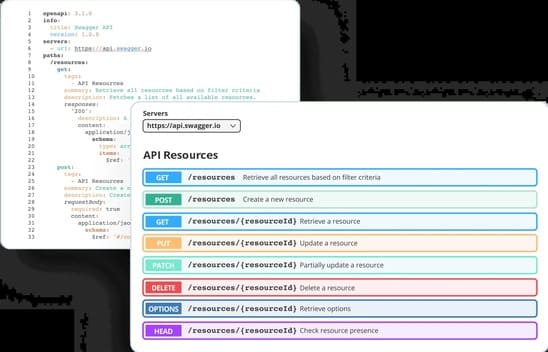
Generating Swagger Documentation
Now, let’s convert our Joi schemas to Swagger format:
const { joiToSwagger } = require('joi-to-swagger');

// Convert schemas to Swagger components
const swaggerComponents = {
  schemas: {
    CreateUser: joiToSwagger(createUserSchema).swagger,
    UserResponse: joiToSwagger(userResponseSchema).swagger
  }
};

// Create Swagger documentation
const swaggerDocument = {
  openapi: '3.0.0',
  info: {
    title: 'User Management API',
    version: '1.0.0',
    description: 'API for managing users'
  },
  paths: {
    '/users': {
      post: {
        summary: 'Create a new user',
        tags: ['Users'],
        requestBody: {
          required: true,
          content: {
            'application/json': {
              schema: {
                $ref: '#/components/schemas/CreateUser'
              }
            }
          }
        },
        responses: {
          '201': {
            description: 'User created successfully',
            content: {
              'application/json': {
                schema: {
                  $ref: '#/components/schemas/UserResponse'
                }
              }
            }
          }
        }
      }
    }
  },
  components: swaggerComponents
};
Integrating with Express
Let’s set up the Express application with Swagger UI:
const express = require('express');
const swaggerUi = require('swagger-ui-express');

const app = express();
app.use(express.json());

// Serve Swagger documentation
app.use('/api-docs', swaggerUi.serve, swaggerUi.setup(swaggerDocument));

// User creation endpoint
app.post('/users', (req, res) => {
  const { error, value } = createUserSchema.validate(req.body);
  if (error) {
    return res.status(400).json({ error: error.details[0].message });
  }

  // Create user logic here
  res.status(201).json({
    id: '123e4567-e89b-12d3-a456-426614174000',
    ...value,
    createdAt: new Date().toISOString()
  });
});

app.listen(3000, () => {
  console.log('Server running on http://localhost:3000');
  console.log('API Documentation available at http://localhost:3000/api-docs');
});
Note: API Documentation available at http://localhost:3000/api-docs
Best Practices
1. Schema Organization
// ❌ Bad Practice
const userSchema = Joi.object({
  // All fields in one schema
});

// ✅ Good Practice
const baseUserSchema = {
  username: Joi.string().min(3).max(30).required(),
  email: Joi.string().email().required()
};

const createUserSchema = Joi.object({
  ...baseUserSchema,
  password: Joi.string().min(8).required()
});

const updateUserSchema = Joi.object({
  ...baseUserSchema,
  age: Joi.number().integer().min(18)
});
2. Documentation Enhancement
// ❌ Bad Practice
const schema = Joi.object({
  name: Joi.string().required()
});

// ✅ Good Practice
const schema = Joi.object({
  name: Joi.string().required()
    .description('User\'s full name')
    .example('John Doe')
    .meta({
      swagger: {
        description: 'The user\'s full name as it appears on official documents'
      }
    })
});
3. Error Handling
// ❌ Bad Practice
app.post('/users', (req, res) => {
  const { error } = schema.validate(req.body);
  if (error) {
    res.status(400).send(error.message);
  }
});

// ✅ Good Practice
app.post('/users', (req, res) => {
  const { error, value } = schema.validate(req.body, {
    abortEarly: false,
    stripUnknown: true
  });

  if (error) {
    return res.status(400).json({
      status: 'error',
      message: 'Validation failed',
      details: error.details.map(detail => ({
        field: detail.path.join('.'),
        message: detail.message
      }))
    });
  }
});
Advanced Features
1. Custom Swagger Extensions
const schema = Joi.object({
  userId: Joi.string().uuid()
    .meta({
      swagger: {
        'x-codegen-request-body-name': 'user',
        'x-codegen-request-body-example': {
          userId: '123e4567-e89b-12d3-a456-426614174000'
        }
      }
    })
});
2. Security Definitions
const swaggerDocument = {
  // ... other configurations
  components: {
    securitySchemes: {
      bearerAuth: {
        type: 'http',
        scheme: 'bearer',
        bearerFormat: 'JWT'
      }
    }
  },
  security: [{
    bearerAuth: []
  }]
};
For production deployments, make sure to follow best practices for production setup and implement proper health checks to ensure your API remains reliable and maintainable.
Conclusion
Using joi-to-swagger to generate API documentation provides several benefits:
- Single source of truth for validation and documentation
- Reduced maintenance overhead
- Consistent API documentation
- Interactive testing capabilities
- Better developer experience
By following the best practices outlined in this guide, you can create comprehensive and maintainable API documentation that stays in sync with your validation logic.
Key takeaways:
- Use Joi schemas as the single source of truth
- Enhance schemas with descriptive metadata
- Organize schemas for reusability
- Implement proper error handling
- Leverage advanced Swagger features
✨ Thank you for reading! I welcome your feedback and questions in the comments section.